Layer chicken feeding is a critical aspect of poultry farming‚ ensuring optimal growth and egg production. A well-structured feeding guide helps farmers provide balanced nutrition‚ focusing on essential nutrients like protein‚ energy‚ and calcium. Proper feeding programs‚ divided into phases such as starter‚ grower‚ and layer diets‚ support health and productivity. A balanced diet enhances egg quality‚ while a structured feeding schedule ensures efficiency and profitability for farmers.

Overview of Layer Chicken Nutrition
Layer chicken nutrition focuses on providing balanced diets to support egg production‚ growth‚ and overall health. The feed must include essential nutrients such as protein‚ energy‚ calcium‚ and vitamins. Protein is crucial for feather and egg production‚ while calcium strengthens eggshells. Energy requirements are higher for laying hens to sustain daily egg output. Vitamins like D3 enhance calcium absorption‚ ensuring strong eggshell quality. A deficiency in any nutrient can lead to poor egg production or health issues. Farmers must ensure layer feeds are formulated to meet these nutritional needs‚ adapting to the bird’s life stage and production goals. Proper nutrition is vital for maximizing egg yield and maintaining flock health.
Importance of a Feeding Guide for Layer Chickens
A feeding guide is essential for maximizing egg production and ensuring the health of layer chickens. It provides a structured approach to nutrition‚ preventing overfeeding or underfeeding‚ which can lead to health issues or reduced productivity. A well-designed guide ensures that birds receive the right nutrients at each growth stage‚ optimizing egg yield and quality. It also helps farmers manage feed costs effectively‚ reducing waste and enhancing profitability. By following a feeding guide‚ farmers can address specific dietary needs‚ such as calcium for eggshell strength and protein for feather and egg production. This tailored approach ensures that layer chickens remain healthy and productive throughout their laying cycle‚ ultimately benefiting both the flock and the farm’s success.
Understanding Layer Chicken Growth Phases
Layer chickens grow through three distinct phases: chick starter (0-6 weeks)‚ grower (7-18 weeks)‚ and layer (18+ weeks). Each phase requires tailored nutrition for optimal development.
Chick Starter Diet (0-6 Weeks)
The chick starter diet is crucial for young layer chickens‚ typically provided from 0 to 6 weeks of age. This diet is high in protein‚ usually around 18-20%‚ to support rapid growth and development. It also includes essential vitamins and minerals like calcium and phosphorus for strong bone formation. The starter feed is often in a mash form to ensure easy consumption for the chicks. Proper nutrition during this phase sets the foundation for healthy growth and future egg production. Farmers should ensure access to fresh water and a clean feeding area to promote optimal health and avoid early-life stress. Consistency in feeding schedules is key for maximizing growth potential during these critical weeks.
Grower Diet (7-18 Weeks)
The grower diet is provided to layer chickens from 7 to 18 weeks of age‚ focusing on continued growth and development. This phase transitions the chicks from the starter diet to a slightly lower protein content‚ typically around 14-16%‚ to support muscle and frame development. The grower feed is formulated to ensure proper body weight and skeletal growth‚ preparing the birds for egg production. It includes balanced levels of energy‚ calcium‚ and vitamins to support overall health. Farmers should gradually introduce the grower diet to prevent digestive issues‚ ensuring a smooth transition from the starter phase. Proper feeding management during this period is essential for achieving optimal size and readiness for the layer phase. Consistent access to fresh water and a nutritious diet are critical for healthy development.
Layer Diet (18 Weeks and Older)
The layer diet is introduced when hens reach 18 weeks of age‚ marking the onset of egg production. This feed is specifically formulated to support high egg output and strong eggshell quality. Layer feed typically contains 16-18% protein‚ increased calcium levels for eggshell formation‚ and additional vitamins like Vitamin D3 to enhance calcium absorption. Energy content is adjusted to meet the higher metabolic demands of laying hens. The diet is optimized to ensure consistent egg size‚ quality‚ and production rate. Farmers should provide layer feed ad libitum‚ allowing hens to eat as needed to maintain their energy balance. Proper hydration and a clean feeding environment are also crucial to maximize the effectiveness of the layer diet and overall flock productivity. Regular monitoring ensures the diet meets the hens’ nutritional requirements.
Nutritional Requirements for Layer Chickens
Layer chickens require a balanced diet rich in protein‚ energy‚ calcium‚ and vitamins to support egg production and overall health. Nutrient levels must be optimized for age and production stage to ensure efficient growth and egg quality. A well-formulated feed meets these requirements‚ promoting longevity and productivity; Regular monitoring ensures dietary needs are met.
Protein Content in Layer Feed
Protein is a vital component in layer chicken feed‚ typically accounting for 16-18% of the diet. High-quality protein sources‚ such as soybean meal and fish meal‚ are essential for egg production and maintaining the hen’s overall health. Adequate protein intake ensures strong eggshell formation and supports the hen’s metabolic functions. Insufficient protein can lead to reduced egg output and weaker shells‚ while excess protein may increase feed costs without additional benefits. Proper balancing of protein in layer feed is crucial for optimizing both productivity and profitability in poultry farming. Regular monitoring and adjustments ensure the right protein levels are maintained throughout the laying cycle.
Energy Requirements for Egg Production
Energy is a critical component in layer chicken feed‚ directly influencing egg production and overall performance. Layer feeds typically contain 2‚800-3‚000 kcal of metabolizable energy per kilogram‚ ensuring hens have the energy needed for egg synthesis. Grains like corn and wheat are primary energy sources‚ while fats can supplement energy levels. Insufficient energy can lead to reduced egg size and output‚ while excessive energy may result in unnecessary weight gain and higher feed costs. Balancing energy intake with other nutrients is essential for maintaining productivity and egg quality. Proper feed formulation ensures energy requirements are met‚ supporting optimal egg production and hen health throughout the laying cycle.
Calcium and Vitamin D3 for Eggshell Quality
Calcium is essential for layer chickens to produce strong‚ durable eggshells‚ while Vitamin D3 enhances calcium absorption‚ ensuring optimal shell quality. Layer feeds typically contain 4% calcium‚ primarily sourced from limestone or oyster shells. Deficiencies can lead to thin‚ brittle‚ or deformed eggshells‚ reducing egg quality and profitability. Vitamin D3 plays a crucial role in maintaining calcium balance‚ preventing metabolic bone diseases. Farmers often supplement diets with D3 to ensure proper calcium utilization‚ especially in regions with limited sunlight‚ as natural Vitamin D synthesis in hens is sunlight-dependent. Balancing these nutrients is critical for achieving strong‚ marketable eggs and maintaining hen health throughout the laying cycle. Proper calcium and Vitamin D3 levels ensure both productivity and egg quality‚ making them cornerstone nutrients in layer feeding programs.
Layer Chicken Feeding Program
A structured feeding program ensures layer chickens receive optimal nutrition at each growth stage‚ promoting healthy development and consistent egg production through tailored diets and scheduled feeding.
Phase 1: Chick Starter (0-6 Weeks)
The chick starter phase is critical for establishing strong growth and development in layer chickens. During this period‚ chicks require a high-protein diet‚ typically containing 18-20% protein‚ to support rapid muscle development and growth. The starter feed should be finely ground or in crumb form for easy digestion. It’s essential to provide fresh water at all times to ensure proper hydration and nutrient absorption. Feed should be offered 4-5 times daily to prevent waste and ensure consistent access. Overfeeding should be avoided to prevent health issues. This phase lays the foundation for future egg production‚ making it vital to maintain a balanced and nutrient-rich diet. Proper management during these initial weeks ensures healthy development and sets the stage for the next growth phases.
Phase 2: Grower (7-18 Weeks)
During the grower phase (7-18 weeks)‚ layer chickens transition from starter feed to a grower diet‚ with protein content typically reduced to 14-16%. This phase focuses on continued growth and development‚ preparing the birds for egg production. The feed should be in crumble or pellet form for easy digestion. Chickens should have unrestricted access to feed‚ with feeding twice daily to minimize waste. Fresh water must always be available to support hydration and nutrient absorption. Monitoring growth and adjusting feed intake ensures optimal development. This period is crucial for building the frame and body reserves needed for future egg-laying. Proper nutrition during this phase ensures a smooth transition to the layer diet‚ promoting long-term productivity and health.
Phase 3: Layer Feed (18 Weeks and Older)
Phase 3 begins when the chickens are around 18 weeks old and are ready to start laying eggs. The feed during this phase is specially formulated to support egg production‚ with a focus on nutrients like calcium for strong eggshells and appropriate protein levels to maintain health. The energy content is adjusted to meet the higher demands of laying eggs. It’s important to provide layer feed in a form that’s easy for the chickens to digest‚ such as pellets or layers mash‚ and to ensure they have constant access to fresh water to support digestion and overall health. Farmers should monitor the chickens’ intake to avoid overfeeding‚ which can lead to issues like obesity. Proper feeding in this phase ensures consistent egg production and maintains the flock’s overall well-being.
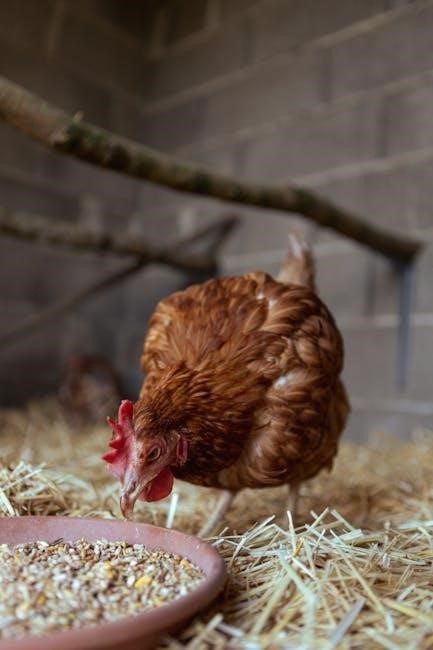
Feed Intake and Consumption Rates
Layer chickens typically consume 100-120 grams of feed per day. Their intake is lower than broilers due to slower growth rates and energy use for egg production.
Daily Feed Intake for Layer Chickens
Layer chickens typically consume between 100-120 grams of feed per day‚ depending on factors such as age‚ weight‚ and stage of egg production. This intake supports both maintenance and egg-laying needs. Younger layers or those in early production may eat slightly less‚ while older birds may consume more due to increased energy demands. Feed quality and nutrient balance also influence daily intake‚ as hens regulate consumption to meet metabolic requirements. Proper feeding schedules and access to fresh water are essential to ensure optimal intake levels. Monitoring individual bird behavior and adjusting feed availability can help maintain healthy consumption rates and overall flock productivity.
Factors Affecting Feed Consumption
Feed consumption in layer chickens is influenced by several factors‚ including age‚ body weight‚ and stage of egg production. Younger layers tend to eat less‚ while older birds consume more to meet higher energy demands. Environmental conditions‚ such as temperature and humidity‚ also play a role‚ as extreme heat can reduce intake. Feed quality and palatability significantly impact consumption‚ with balanced and nutrient-rich diets promoting better intake. Access to fresh water is crucial‚ as dehydration can lead to reduced feeding. Health issues‚ such as parasites or diseases‚ can also lower feed consumption. Management practices‚ like feeding schedules and feed restriction strategies‚ further influence intake rates. Monitoring these factors helps optimize feeding efficiency and ensure flock productivity.
Transitioning to Layer Feed
Transitioning to layer feed typically occurs at 18 weeks‚ gradually replacing grower feed to ensure a smooth shift to egg production. This prevents digestive disruptions and supports optimal laying performance.
When to Switch to Layer Feed
The transition to layer feed typically begins at around 18 weeks of age‚ just before hens start laying eggs. This period is crucial as it prepares the hens for the energy demands of egg production. Farmers should avoid waiting until the first egg appears‚ as early adaptation ensures better performance. A gradual transition over 7-10 days helps prevent digestive issues. Proper timing aligns nutrient intake with physiological changes‚ optimizing eggshell quality and overall health. This phase is vital for sustaining long-term productivity and egg output in layer chickens.
How to Transition from Grower to Layer Feed
Transitioning from grower to layer feed should be done gradually to prevent digestive upset and stress. Start by mixing a small portion of layer feed with the grower feed‚ increasing the proportion daily over 7-10 days. This ensures a smooth adaptation to the new diet. Monitor the hens’ health and adjust the transition period if necessary. Avoid sudden changes‚ as this can lead to reduced performance. Proper management during this phase is critical for maximizing egg production and maintaining eggshell quality. A well-planned transition ensures a seamless shift to the layer phase‚ supporting long-term productivity. Consistency and careful observation are key to a successful transition.
Health Considerations in Layer Feeding
Proper layer feeding supports hen health‚ preventing issues like weak eggshells and digestive problems. A balanced diet rich in calcium and vitamins ensures strong immune systems and egg quality.
Common Health Issues Related to Feeding
Improper feeding practices can lead to various health issues in layer chickens‚ such as weak eggshell quality‚ digestive disorders‚ and metabolic problems. Nutritional deficiencies‚ especially in calcium and vitamin D3‚ often result in poor eggshell formation and increased risk of fractures. Overfeeding or underfeeding can cause obesity or malnutrition‚ affecting overall health and productivity. Additionally‚ feeding contaminated or poorly formulated diets may lead to diseases like coccidiosis or fatty liver syndrome. Ensuring a balanced and hygienic diet is crucial to maintain the health and productivity of layer chickens. Regular monitoring of feed quality and intake helps prevent these issues‚ promoting a healthy flock and optimal egg production.
Role of Probiotics in Layer Feeding
Probiotics play a significant role in enhancing the digestive health of layer chickens‚ improving nutrient absorption and overall productivity. By maintaining a healthy gut microbiome‚ probiotics boost the immune system‚ reducing the risk of diseases. They also contribute to better egg quality by increasing calcium absorption‚ which strengthens eggshells. Additionally‚ probiotics can reduce harmful pathogens in the gut‚ promoting a cleaner and more efficient digestive system. Including probiotics in layer feed supports sustainable and healthy egg production‚ making them a valuable addition to modern feeding programs. Their benefits extend to improving feed efficiency and reducing mortality rates‚ ensuring a robust and productive flock.
Best Management Practices
Implementing clean‚ well-ventilated housing and structured feeding schedules ensures optimal layer health. Restricted feeding during rearing and using probiotics enhances efficiency and reduces disease risks‚ promoting sustainability.
Housing and Feeding Area Management
Proper housing and feeding area management are crucial for layer chicken productivity. Use clean‚ well-ventilated spaces made from easy-to-clean materials like metal or plastic to prevent disease spread. Implementing an all-in‚ all-out principle ensures no overlap between batches‚ reducing disease transmission risks. Ensure adequate space per bird to prevent stress and promote feeding efficiency. Feeding areas should be well-organized to minimize waste and ensure all birds can access feed easily. Regular cleaning and disinfection of feeding troughs and living areas are essential for maintaining hygiene. These practices contribute to a healthy environment‚ supporting optimal growth and egg production in layer chickens. Proper management also enhances feed utilization and overall flock performance.
Feeding Schedule and Discipline
A consistent feeding schedule is vital for layer chicken productivity. Feed should be provided at the same times daily to establish a routine‚ ensuring birds eat optimally. Overfeeding or underfeeding can lead to health issues and reduced egg production. Stick to recommended daily intake levels‚ typically around 100-120 grams per bird. Avoid free-choice feeding‚ as it can result in overconsumption and waste. Implementing a disciplined feeding plan prevents metabolic disorders and maintains flock health. Regular monitoring ensures adherence to the schedule‚ promoting uniform growth and consistent egg output. Discipline in feeding schedules also helps in managing feed costs and maximizing the genetic potential of layer chickens. Consistency is key to achieving optimal results in egg production and overall flock performance.
Monitoring and Adjustments
Regularly monitor layer chickens’ growth‚ egg production‚ and feed consumption to ensure optimal performance. Adjust feed quantity and quality based on growth stages and productivity. Maintain precise records to track progress and make timely modifications for better outcomes. Consistent monitoring helps identify potential issues early‚ allowing for swift corrective actions to maintain flock health and productivity. Adjustments should align with the feeding guide to ensure balanced nutrition and maximize egg output. Regular weighing of birds and observing feeding behavior are crucial for making informed decisions. Timely adjustments prevent growth setbacks and ensure efficient resource utilization. Monitoring and adapting feeding strategies are essential for sustainable layer chicken farming. Ensure all adjustments are documented for future reference. Always prioritize bird health and productivity when making changes. Stay vigilant to environmental factors that may impact feeding needs. Adjustments should be gradual to avoid stressing the flock. Use data from monitoring to refine feeding practices continuously. This approach ensures long-term success in layer chicken farming. Always consult the feeding guide for specific recommendations during adjustments.
Tracking Growth and Egg Production
Tracking growth and egg production is essential for evaluating the effectiveness of your layer chicken feeding program. Measure body weight‚ feed intake‚ and egg output regularly. Maintain detailed records to monitor progress and identify trends. Compare actual growth rates and egg production against expected benchmarks from the feeding guide. Adjustments to feed quality or quantity can be made based on this data. Regularly inspect eggs for size‚ shape‚ and shell quality to ensure optimal results. Use this information to refine feeding strategies and improve flock performance. Tracking helps in identifying potential issues early‚ such as nutritional deficiencies or health problems‚ allowing for timely interventions. This data-driven approach ensures the flock remains healthy and productive‚ maximizing the efficiency of the feeding program. Consistent monitoring is key to achieving long-term success in layer chicken farming.
Adjusting Feed Based on Performance
Adjusting feed based on performance ensures optimal results in layer chicken farming. Monitor feed intake‚ egg production‚ and bird health to assess dietary effectiveness. If egg production or growth rates fall below expectations‚ evaluate the feed formulation. Increase protein levels if underweight or improve calcium content for stronger eggshells. Consider adding probiotics to enhance digestion and nutrient absorption. Regularly assess the energy and nutrient balance in the feed to meet the flock’s needs. Adjustments should also account for environmental factors like temperature‚ which may affect feed consumption. Consult with a poultry nutritionist to fine-tune the diet. Regular performance reviews ensure the feeding program remains aligned with flock requirements‚ promoting health and productivity. Timely adjustments prevent deficiencies and support long-term success in egg production.
Proper layer chicken feeding ensures healthy growth‚ optimal egg production‚ and long-term flock success. A structured approach to nutrition‚ aligned with bird age and performance‚ guarantees sustainability.
A well-structured feeding program is essential for layer chickens‚ ensuring optimal growth and egg production. The program is divided into three phases: chick starter (0-6 weeks)‚ grower (7-18 weeks)‚ and layer feed (18 weeks and older). Each phase requires specific nutritional balances‚ with protein‚ energy‚ and calcium being critical for eggshell quality and overall health. Proper feed transition‚ avoiding sudden changes‚ is vital to prevent stress. Monitoring daily feed intake and adjusting based on performance ensures efficiency. Maintaining a clean feeding area and adhering to a disciplined schedule are best practices. Regular health checks and the use of probiotics can enhance digestion and productivity. Consistent adherence to these practices maximizes egg yield and flock longevity‚ ensuring a successful and sustainable layer farming operation.
Final Tips for Successful Layer Chicken Feeding
For optimal results in layer chicken feeding‚ ensure a balanced diet tailored to each growth phase. Provide fresh water and a clean feeding environment to prevent disease. Transition feeds gradually to avoid stress‚ and monitor egg production and health regularly. Incorporate probiotics to enhance digestion and nutrient absorption. Maintain a consistent feeding schedule to promote uniform growth and productivity. Avoid overfeeding to reduce waste and costs. Regularly inspect feed quality and store it properly to maintain nutritional value. Keep accurate records of feed consumption and egg output for better management decisions. Stay updated on best practices and consult poultry experts for personalized advice. By following these tips‚ you can maximize egg yield‚ ensure flock health‚ and achieve long-term success in layer chicken farming.