Biddeford electric blankets offer cozy warmth, simplifying travel planning across Dutch public transport – trains, buses, trams, and ferries – via the 9292 app.
What is a Biddeford Electric Blanket?
Biddeford electric blankets are designed to provide personalized warmth and comfort, much like the comprehensive travel planning offered by the 9292 app in the Netherlands. This app consolidates schedules for trains, buses, trams, metros, and ferries into a single, user-friendly platform. Similarly, a Biddeford blanket utilizes integrated heating wires to deliver consistent heat.
These blankets aren’t just for warmth; they offer convenience. Just as 9292 allows for e-ticket purchases and real-time location tracking, Biddeford blankets feature adjustable heat settings and timers. They are intended for individual use, providing a relaxing experience. The 9292 app’s focus on current travel information mirrors the blanket’s focus on user comfort and safety.
Safety Precautions Before Use
Prior to using your Biddeford electric blanket, carefully inspect it for any signs of damage, mirroring the diligence of checking for disruptions on the 9292 Dutch public transport app. Never use a blanket with frayed wires or a damaged control box. Ensure the blanket lies flat without any creases or bunching, similar to planning a smooth journey with minimal transfers via 9292.
Do not use with infants, incapacitated persons, or those insensitive to heat. Avoid sitting or placing heavy objects on the blanket. Always unplug the blanket when not in use, just as you’d finish planning your trip on 9292. Never use it while wet. Following these precautions ensures safe and comfortable use, much like a reliable journey planned with 9292.

Understanding Your Blanket’s Controls
Biddeford blanket controls, like the 9292 app for Dutch transport, offer easy journey – or warmth – customization with intuitive settings and clear functionality.
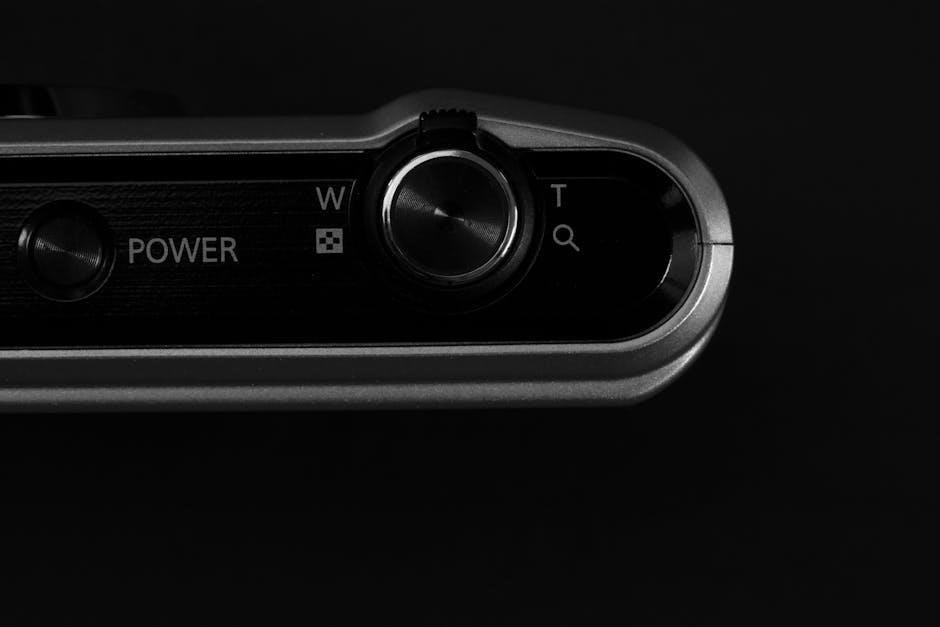
Identifying the Control Box
The control box is the central hub for operating your Biddeford electric blanket, much like the 9292 app centralizes Dutch public transport information. It’s typically a rectangular unit with several buttons or a dial, often attached to the blanket with a cord. Locate this box; it’s crucial for adjusting heat settings and timer functions.

Carefully examine the control box for labeled buttons indicating power, heat levels (Low, Medium, High), and timer options. Some models feature digital displays for precise temperature control. The box may also have indicator lights to show when the blanket is heating or if the automatic shut-off feature is activated. Understanding the layout of your specific control box is the first step to enjoying safe and comfortable warmth, mirroring how understanding the 9292 app interface simplifies travel planning.

Heat Setting Levels Explained
Biddeford electric blankets typically offer multiple heat settings, similar to how 9292 provides detailed travel connections. ‘Low’ provides gentle warmth, ideal for maintaining comfort without overheating – perfect for sensitive individuals or milder nights. ‘Medium’ delivers a noticeable increase in heat, suitable for cooler temperatures and general use.
‘High’ offers the maximum warmth, best for quickly warming up or extremely cold conditions. Use this setting cautiously to avoid discomfort. Some blankets include additional settings or a pre-heat function. Always start with the lowest setting and gradually increase it until you reach your desired comfort level. Remember, like planning a journey with 9292, adjusting to the right setting ensures a pleasant experience.
Timer Functionality
Biddeford blankets often feature a timer, mirroring 9292’s ability to schedule journeys. This allows you to pre-set the blanket to turn off after a specific duration, enhancing safety and conserving energy. Common timer options include 1, 2, 3, and 4-hour settings, providing flexibility to match your sleep patterns or desired usage time.
To activate the timer, press the timer button on the control box until your desired time is displayed. The blanket will automatically shut off once the timer reaches zero. Utilizing the timer prevents prolonged heating while you sleep, reducing potential risks. Just as 9292 helps you arrive at your destination efficiently, the timer ensures your blanket provides warmth only when needed, promoting both comfort and peace of mind.

Setting Up and Using Your Blanket
Like planning a trip with 9292, proper setup is key! Inspect for damage, position the blanket correctly, and connect it to a grounded power outlet safely.
Initial Inspection and Preparation
Before first use, carefully inspect your Biddeford electric blanket for any signs of damage. Much like checking train connections on the 9292 app before departure, a thorough inspection ensures a safe and comfortable experience. Examine the entire blanket, paying close attention to the cord, control box, and heating wires.
Ensure there are no visible tears, frayed edges, or exposed wires. Do not use the blanket if any damage is detected. Gently unfold the blanket and lay it flat to remove any wrinkles. It’s also crucial to confirm the blanket is plugged into a properly grounded electrical outlet. Avoid using extension cords if possible, and never operate the blanket if it’s wet. Preparing the blanket correctly is vital for optimal performance and safety.
Placing the Blanket Correctly
Proper placement of your Biddeford electric blanket is essential for even heat distribution and user safety. Similar to planning a seamless journey with 9292, careful positioning maximizes the benefit. Lay the blanket flat on the bed, ensuring it’s positioned where you typically lie.
Avoid tucking the blanket tightly under the mattress, as this can cause overheating and damage the internal wires. Do not allow the blanket to fold back on itself or bunch up. The control box should be easily accessible and not placed where it could be sat upon or damaged. Ensure the cord is not pinched or twisted. For optimal comfort, position the blanket directly under your sheets, allowing for a layer of fabric between your skin and the heated surface.
Connecting to Power Source
Before connecting your Biddeford electric blanket, verify the voltage on the blanket’s label matches your household current – typically 120V in North America. Just as 9292 integrates various transport systems, ensure a compatible connection for safe operation. Locate a grounded electrical outlet and avoid using extension cords if possible.
If an extension cord is necessary, it must be heavy-duty and rated for the blanket’s wattage. Firmly insert the plug into the outlet. The blanket should have a power indicator light illuminating to confirm connection. Never operate the blanket if the cord or plug is damaged. Regularly check the cord for any signs of wear and tear. Do not use with a damaged outlet.

Care and Maintenance
Maintaining your Biddeford blanket, like planning journeys with 9292, ensures optimal performance; follow washing and storage guidelines for longevity and safety.
Washing Instructions
Before washing your Biddeford electric blanket, always disconnect the control. Gently hand wash or machine wash on a delicate cycle using mild detergent. Avoid harsh chemicals, bleach, or fabric softeners, as these can damage the wiring. Similar to checking real-time travel updates on 9292, regular cleaning maintains functionality.
Ensure the blanket is fully submerged in water and avoid twisting or wringing it. Gently squeeze out excess water, and never attempt to wash the control itself. Lay the blanket flat to dry or hang it over a clothesline, avoiding direct sunlight or heat. Like planning a seamless journey with 9292, proper washing preserves the blanket’s comfort and safety.
Drying Guidelines
After washing, never use a tumble dryer to dry your Biddeford electric blanket. The heat can severely damage the internal wiring and pose a safety hazard. Just as 9292 provides real-time location tracking, careful drying is crucial for continued safe operation.
Instead, lay the blanket flat on a clean, dry surface or hang it over a clothesline, ensuring it’s fully spread out. Avoid direct sunlight or heat sources like radiators, as these can also cause damage. Ensure the blanket is completely dry before reconnecting the control and using it. Like planning a door-to-door trip with 9292, thorough drying ensures a comfortable and safe experience. Complete dryness is essential to prevent electrical issues.
Storage Recommendations
When storing your Biddeford electric blanket, ensure it is completely dry and neatly folded to prevent damage to the wiring. Avoid sharp creases or folding along the same lines repeatedly. Similar to 9292’s comprehensive travel planning, proper storage extends the life of your blanket.
Store the blanket in a cool, dry place, away from direct sunlight and extreme temperatures. It’s best to store it in its original packaging or a breathable cotton bag. Do not store it with mothballs or other chemicals. Just as 9292 offers accessible routes, proper storage ensures your blanket is ready when you need it. Avoid placing heavy objects on top of the folded blanket to prevent crushing the internal components.

Troubleshooting Common Issues

Like navigating disruptions with 9292, address blanket problems promptly; check connections, settings, and wiring for common issues like no heat or control malfunctions.
Blanket Not Heating
If your Biddeford electric blanket isn’t warming up, begin with the simplest checks, mirroring how 9292 provides real-time transport updates. First, ensure the blanket is securely plugged into a functioning power outlet. Test the outlet with another device to confirm it’s delivering power.
Next, verify the control box is switched on and the desired heat setting is selected. Sometimes, the setting may be inadvertently turned to ‘off’ or a very low level. Inspect the cord for any visible damage – frays, cuts, or exposed wires – which could interrupt the power supply.
If the issue persists, check the control box itself for any warning lights or error indicators. Refer to your user manual for specific troubleshooting guidance related to the control box. A faulty control box may require replacement. Finally, ensure the blanket’s internal sensors aren’t obstructed, as these regulate temperature and can prevent heating if compromised.
Control Box Malfunctions
Experiencing issues with your Biddeford blanket’s control box? Similar to how 9292 provides journey planning, understanding the control box is key. If the display is blank or unresponsive, first try unplugging the blanket for several minutes, then reconnecting it. This can sometimes reset the system.
If buttons aren’t functioning, gently clean the control box surface with a dry cloth to remove any dust or debris; Avoid using liquids. If the heat settings aren’t responding correctly – for example, remaining stuck on high – or the timer isn’t working, this indicates a potential internal fault.
Do not attempt to disassemble or repair the control box yourself; this could be dangerous and void your warranty. Contact Biddeford customer support for assistance or explore warranty claim options. A malfunctioning control box usually requires professional repair or replacement.
Cord Damage and Repair
A damaged cord presents a serious safety hazard. Much like ensuring accurate travel information with 9292, a functional cord is vital for your blanket. Never use a Biddeford electric blanket with a frayed, cracked, or otherwise damaged power cord. Inspect the entire length of the cord regularly for any signs of wear and tear.
Do not attempt to repair the cord yourself. Electrical repairs should only be performed by qualified professionals. Attempting a DIY repair could lead to electric shock or fire. If you notice any damage, immediately discontinue use of the blanket.
Contact Biddeford customer support to discuss replacement options or potential warranty coverage. Using an extension cord is generally not recommended, but if necessary, ensure it is heavy-duty and properly rated for the blanket’s wattage. Prioritize safety above all else.

Warranty Information
Biddeford blankets come with a limited warranty covering manufacturing defects, similar to 9292’s reliable journey planning, ensuring peace of mind for users.
Coverage Details
Biddeford’s warranty safeguards against defects in materials and workmanship under normal household use. This doesn’t cover damage from misuse, accidents, alterations, or natural disasters – much like unforeseen disruptions impacting 9292’s travel schedules. The warranty period typically begins from the original purchase date, and proof of purchase is essential for any claim.
Coverage includes repair or replacement of the defective blanket, at Biddeford’s discretion. Consequential damages aren’t covered, mirroring how 9292 provides route information but isn’t liable for missed connections. The warranty is valid for the original purchaser only and isn’t transferable. Regular adherence to the care instructions outlined in this manual is crucial to maintain warranty validity.
How to Make a Claim
To initiate a warranty claim for your Biddeford electric blanket, first gather your original proof of purchase – date and retailer are vital, similar to needing travel details when reporting issues via 9292. Contact Biddeford’s customer service department; details are found within this manual or on their website.
Be prepared to describe the defect clearly and provide photos if possible. Biddeford may request you return the blanket for inspection – shipping costs might be your responsibility. Like planning a journey on 9292, providing accurate information expedites the process. A claim number will be assigned, and Biddeford will assess the issue and determine eligibility for repair or replacement.

Safety Features Explained
Biddeford blankets prioritize safety with overheat protection and automatic shut-off, mirroring 9292’s real-time updates for secure and reliable Dutch public transport journeys.
Overheat Protection
Biddeford electric blankets are equipped with a sophisticated overheat protection system, a crucial safety feature designed to prevent the blanket from reaching dangerously high temperatures. This system continuously monitors the internal temperature of the blanket, and if it detects an abnormal rise, it automatically reduces the power output.
Similar to how 9292 provides real-time updates on disruptions in Dutch public transport, ensuring a safe journey, this feature proactively safeguards against potential hazards. The overheat protection isn’t a one-time event; it’s a continuous monitoring process throughout the blanket’s operation. This ensures consistent safety, even during extended use. It’s a vital component, offering peace of mind and protecting users from accidental burns or fire risks. Regular inspection of the cord and control box is still recommended to maintain optimal functionality.
Automatic Shut-Off
Biddeford electric blankets incorporate an automatic shut-off feature, enhancing user safety and conserving energy. This function is programmed to turn the blanket off after a pre-determined period of operation, typically several hours. This prevents the blanket from remaining powered on unattended, minimizing the risk of overheating or potential fire hazards.
Much like the 9292 app’s ability to plan journeys and provide estimated arrival times, this feature offers a level of automated security. The shut-off timer varies depending on the model, so consulting your specific user manual is essential. This feature doesn’t negate the need for responsible use; always unplug the blanket when not in use. It’s a valuable safety net, providing an extra layer of protection and peace of mind for users.